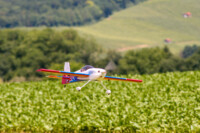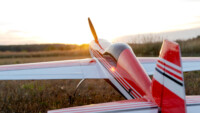
What is the Best Way to Paint Model Airplanes?
7 November 2023 | Updated on January 03, 2024
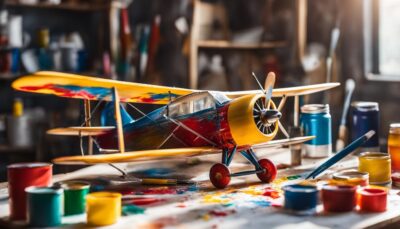
Painting model airplanes is an exciting and creative process that adds a touch of realism to your builds. Whether you’re a beginner or an experienced modeler, knowing the best painting techniques can make a significant difference in the final result. In this article, we will explore the various methods of painting model airplanes and provide insights on how to achieve the best possible outcomes.

Key Takeaways:
- Use paint specifically designed for plastic models to ensure proper adhesion and coverage.
- Acrylic paints are beginner-friendly, non-toxic, and dry quickly. Enamel paints offer durability and a glossy finish.
- Brush painting allows for better control and precision, while airbrushing provides a smoother, professional finish.
- Experiment with different techniques, such as thinning the paint and applying multiple layers, to achieve desired effects.
- Proper surface preparation and cleaning are essential for efficient paint adhesion and avoiding common painting issues.
Acrylic Paint vs. Enamel Paint: Which is Better for Model Airplanes?
When it comes to painting model airplanes, one of the key decisions you’ll need to make is choosing the right type of paint. The two main options are acrylic paint and enamel paint, each with its own set of pros and cons. Let’s take a closer look at these two types of paint and explore how they differ.
Acrylic Paint
Acrylic paint is a popular choice among model airplane enthusiasts for several reasons. Firstly, it is water-based and non-toxic, making it easier to work with and clean up. This is especially beneficial for beginners or those working in small, poorly-ventilated spaces. Acrylic paints also dry quickly, allowing for faster progress on your model. They can be thinned with distilled water to achieve different consistencies and effects.
Another advantage of acrylic paints is their smooth finish. They provide a uniform and even coating, resulting in a professional-looking model. Additionally, when dry, acrylic paints are waterproof, offering durability and protection for your finished project.
Enamel Paint
Enamel paint, on the other hand, has its own unique advantages that make it a viable option for model airplane painting. Enamel paints are known for their durability, making them ideal for models that are frequently handled or displayed. They provide a glossy finish that can enhance the visual appeal of your model.
While enamel paints take longer to dry compared to acrylics, their longer drying time allows for more workable blending and layering. This can be particularly useful when creating intricate details or weathering effects on your model.
Choosing the Right Paint
Ultimately, the choice between acrylic paint and enamel paint comes down to personal preference and the specific requirements of your model. Consider factors such as ease of use, drying time, and preferred finish. If you’re a beginner or prefer a faster-drying paint with easy clean-up, acrylic paint may be the better option. On the other hand, if you prioritize durability and a glossy finish, enamel paint might be more suitable.
It’s worth noting that both types of paint have their own sets of compatible thinners and solvents, so be sure to choose the appropriate ones to ensure optimal performance and adherence to safety guidelines. Experimenting with different paint types, techniques, and brands can also help you find the perfect combination that suits your style and achieves the desired results for your model airplanes.
Tips and Techniques for Brush Painting Model Airplanes
Brush painting is a popular technique used by beginners to paint model airplanes. It is a cost-effective method that can yield impressive results when done correctly. Here are some tips and techniques to help you brush paint your model airplanes:
1. Prepare the Paint
Before you start painting, make sure to stir the paint well to ensure a consistent color. It is also important to choose the right paint consistency. Aim for a consistency that is slightly thicker than milk. This will help prevent the paint from running and will allow for better control during application. You can adjust the consistency by adding small amounts of water or thinner, depending on the type of paint you are using.
2. Use High-Quality Brushes
The type of brush you use can greatly impact the final result. It is recommended to invest in high-quality artist’s paintbrushes for brush painting model airplanes. These brushes have finer bristles and are designed to hold paint better, allowing for smoother and more precise application. Experiment with different brush sizes to find the ones that work best for different areas and details of your model.
3. Apply Thin Layers
When brush painting, it is important to apply multiple thin layers of paint rather than one thick layer. This technique helps prevent brush marks and allows for better control over the paint application. Allow each layer to dry completely before applying the next one. This will ensure a smooth and even finish. Remember, patience is key when brush painting model airplanes.
| Brush Painting Tips | Techniques for Better Results |
|---|---|
| Stir the paint well before using | Choose the right paint consistency |
| Use high-quality artist’s brushes | Apply multiple thin layers of paint |
| Move the brush in one direction for larger areas | Allow each layer to dry before applying the next |
| Prepare the model by washing off any oil or grease | Prime the model with a light-colored enamel paint for a smoother finish |
| Avoid visible brush marks |
By following these tips and techniques, you can achieve professional-looking results with brush painting. Remember to practice and experiment with different techniques to find what works best for you. Happy painting!

Getting Started with Airbrushing for Model Airplanes
For model airplane enthusiasts looking to take their painting skills to the next level, airbrushing is a technique worth considering. Airbrushing allows for greater precision and control, resulting in a smoother and more professional finish. Here is a beginner’s guide to getting started with airbrushing for model airplanes.
1. Gather the necessary equipment: To begin airbrushing, you will need an airbrush, an air supply such as a compressor or can, and paints specifically formulated for airbrushing. It is important to choose high-quality equipment to ensure optimal results.
2. Practice and experiment: Airbrushing requires practice and experimentation to develop proficiency. Start by practicing on scrap pieces or test models to familiarize yourself with the airbrush and different techniques. Experiment with different paint consistency, air pressure, and nozzle sizes to achieve desired effects.
3. Thinning the paint: Thinning the paint to the correct consistency is crucial for successful airbrushing. Follow the manufacturer’s instructions for the recommended ratio of paint to thinner. Test the paint flow on a piece of scrap material to ensure it sprays smoothly without clogging or spattering.
4. Painting techniques: When airbrushing, it is important to maintain a consistent distance from the model and move the airbrush in smooth, even strokes. Start with light layers, building up the paint gradually to avoid runs or drips. Practice techniques such as shading, highlighting, and blending to add depth and realism to your model.
Tips for Successful Airbrushing:
- Ensure proper ventilation in your workspace to avoid inhaling paint fumes.
- Clean the airbrush thoroughly after each use to prevent clogs or buildup.
- Practice on different surfaces and materials to become familiar with how the paint behaves.
- Experiment with different masking techniques to create intricate patterns or designs.
- Invest in quality paints and equipment for better results.
By following these tips and dedicating time to practice and experimentation, you can master the art of airbrushing and achieve professional-quality finishes on your model airplanes.
Pros and Cons of Airbrushing for Model Airplanes
| Pros | Cons |
|---|---|
| Greater control and precision | Requires practice and skill development |
| Smoother and more professional finish | Can be more expensive than brush painting |
| Ability to create intricate patterns and designs | Requires additional equipment and setup |
| Efficient and time-saving | Requires proper ventilation and safety precautions |
How do you Paint on Tissue Covering Model Airplanes?
Painting on tissue-covered model airplanes can be an intricate process that adds a vivid and authentic look to your model. The first step in this delicate task is to ensure the tissue is properly adhered and tightened. Typically, this involves applying a coat of clear dope, which not only tightens the tissue but also seals it. Once the dope has dried, creating a taut and smooth surface, it’s time to think about priming.
Priming the tissue with a light gray primer serves a dual purpose: it further seals the tissue and provides an opaque background that can make your colors stand out. This step is especially important if you’re aiming for a historically accurate color scheme or if you need a uniform color application. A light coat or two should be sufficient. It’s important to let each layer dry thoroughly to avoid any warping or wrinkling of the tissue.
When it comes to the choice of paint, acrylics are a popular option among modelers for painting tissue. Acrylic paints are water-based, which means they’re less likely to cause the tissue to warp, and they dry relatively quickly. When painting on top of a primed surface, they typically do not bleed, ensuring clean and sharp lines for your airplane’s livery.
Applying the paint requires a gentle hand and patience. Use a fine brush for detailed work and a wider, flat brush for larger areas. It’s best to apply thin coats and build up the color gradually. This technique minimizes the risk of the tissue becoming saturated and sagging under the weight of the paint. Between coats, it’s essential to allow adequate drying time. Once you have achieved the desired finish, a final coat of clear dope can protect your paintwork and add a subtle sheen, completing the look of your beautifully crafted model airplane.
(Tips from https://balsamodels.com)
Troubleshooting Common Painting Issues for Model Airplanes
When it comes to painting model airplanes, it’s not uncommon to encounter some issues along the way. Whether you’re a beginner or an experienced modeler, understanding how to troubleshoot common painting problems can help you achieve better results. In this section, we’ll discuss some of the most common painting issues and provide tips on how to fix them.
Thick and Rough Finish
One of the most frustrating problems in model airplane painting is ending up with a thick and rough finish. This can happen if the paint is not properly thinned or if too much paint is applied in one go. To fix this issue, consider thinning your paint with the appropriate thinner or solvent recommended by the paint manufacturer. Apply thin layers of paint, allowing each layer to dry before adding more. Sanding the rough areas gently with fine-grit sandpaper can also help achieve a smoother finish.
Runs and Drips
Another common issue is the occurrence of runs and drips in the paint. This typically happens when too much paint is applied or when the paint is not properly thinned. To fix this problem, carefully remove any excess paint using a clean brush or cotton swab. If the run or drip has already dried, you can gently sand it down with fine-grit sandpaper and then apply a thin layer of paint over the area. Remember to always work in thin layers to avoid runs and drips.
Adhesion Problems
Efficient paint adhesion is crucial for a durable and long-lasting finish. If you’re experiencing issues with paint not adhering properly to the model, it may be due to inadequate surface preparation. Before painting, make sure to clean the model thoroughly to remove any oils, grease, or dirt. You can use a mild detergent and water solution or rubbing alcohol for this purpose. Additionally, consider using a primer specifically designed for plastic models. Priming the model can help improve paint adhesion and create a smoother finish.
By addressing these common painting issues and following the troubleshooting tips provided, you can overcome challenges and achieve a more satisfying painting outcome for your model airplanes.

Conclusion
In conclusion, painting model airplanes is a crucial step in creating realistic and visually appealing models. Whether you choose to use brush painting or airbrushing techniques, there are several key factors to consider. It is important to select the right paints designed for plastic models, such as acrylic paints, to ensure compatibility and a smooth finish.
Brush painting offers a great starting point for beginners, allowing for more control and precision. By following techniques such as stirring the paint well, applying thin layers, and using high-quality brushes, you can achieve excellent results. If you’re looking for a more professional finish, airbrushing is the way to go. With practice and experimentation, airbrushing techniques can help you achieve smoother and more consistent coverage.
When encountering painting issues, it’s essential to troubleshoot and address them promptly. Thin or thick paint consistency, reactions with plastic materials, and dust or bristle contamination can all impact the final outcome. By understanding these common issues and implementing proper techniques, you can overcome challenges and create outstanding models.
In wrapping up, painting model airplanes is an art that requires patience, practice, and attention to detail. With the right paints, tools, and techniques, you can bring your models to life and showcase your creativity. Whether you’re a beginner or an experienced model builder, painting is a rewarding and enjoyable aspect of the hobby that allows you to personalize and enhance your models.
FAQ
What is the best way to paint model airplanes?
The best way to paint model airplanes is to use a combination of brush painting and airbrushing techniques, depending on your skill level and desired finish.
Should I use acrylic paint or enamel paint for model airplanes?
It is recommended to use acrylic paint for model airplanes as it is non-toxic, easy to work with, and has a smooth finish. Enamel paint can also be used but requires more careful handling and cleanup.
What tips do you have for brush painting model airplanes?
When brush painting model airplanes, it’s important to stir the paint well, use a slightly thicker consistency, apply multiple thin layers, and move the brush in one direction for larger areas to avoid visible brush marks.
How do I get started with airbrushing for model airplanes?
To get started with airbrushing, you will need an airbrush, an air supply, and appropriate paints. Practice is key, and techniques include thinning the paint, building up thin layers, and masking off areas for precise patterns.
What are some common painting issues with model airplanes and how can I troubleshoot them?
Common painting issues include a rough finish, runs and drips, paint reacting poorly with plastic, and inefficient adhesion. Troubleshooting tips include thinning the paint properly, applying multiple thin layers, using the right paint for plastic models, and properly cleaning surfaces before painting.